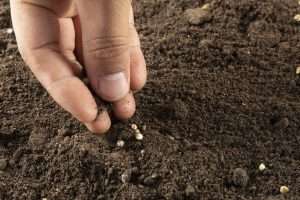
Planting seeds is the foundation of nearly every gardening journey, and planting seeds places you at the beginning of nature’s most rewarding transformation. The very first step in gardening is small and simple: a seed placed into soil with intention. From that moment, you begin a relationship with growth, patience, and nurturing. Whether you are planting flowers for beauty, vegetables for fresh food, or herbs for aroma and kitchen use, your work begins with understanding how seeds become thriving plants. Every seed is a tiny story waiting to unfold.
Getting started with planting seeds does not need to be complicated. The essentials include selecting good seeds, providing the right soil and environmental conditions, and giving proper care throughout the germination process. When beginners follow the right steps, failures become rare and confidence grows quickly. This article explores 14 guide basics that help anyone succeed with their first planting experience, while keeping each step clear and manageable.
Choosing Quality Seeds
Planting seeds starts with choosing good quality seeds that match your climate and environment. Seed packets often contain helpful information about growing zones, sunlight requirements, and planting seasons. Beginners may find it easier to start with varieties known for reliable germination, such as lettuce, marigolds, beans, and basil. Heirloom and organic seeds may offer stronger flavors or unique colors, but standard commercial seeds are perfectly fine for learning.
Understanding seed freshness also matters. Seeds do not last forever, and expired seeds may struggle to sprout. Checking the packaging date or purchasing from trusted suppliers helps ensure better germination outcomes. If using saved seeds from previous harvests, store them in a cool, dry place to protect their viability.
Preparing Your Planting Area
Before planting seeds outdoors or indoors, preparation of the growing area ensures plants have room to thrive. Outdoor plots should be free of rocks, weeds, and debris so roots can grow without obstacles. Indoors, containers such as cell trays, egg cartons, and pots help create neat and organized spaces for early growth.
Good drainage is the key to preventing root rot. When planting outdoors, loose, crumb-free soil is ideal. For indoor planting, containers must have drainage holes so water doesn’t pool at the bottom. Preparing the space ahead of time makes planting day faster and less stressful.
Selecting the Right Soil
Seeds need soil that supports their earliest life stages. Although planting seeds can happen in native garden soil, seed-starting mixes provide gentler support. These mixes are lightweight and allow young roots to breathe. Regular garden soil may be too heavy for delicate seeds and could hold too much water.
Avoid using soil directly from the yard for indoor containers because it may contain pests or fungal problems. Seed-starting products are sterile, reducing risks during germination. Beginning with the proper soil sets seedlings up for stronger success later in the season.
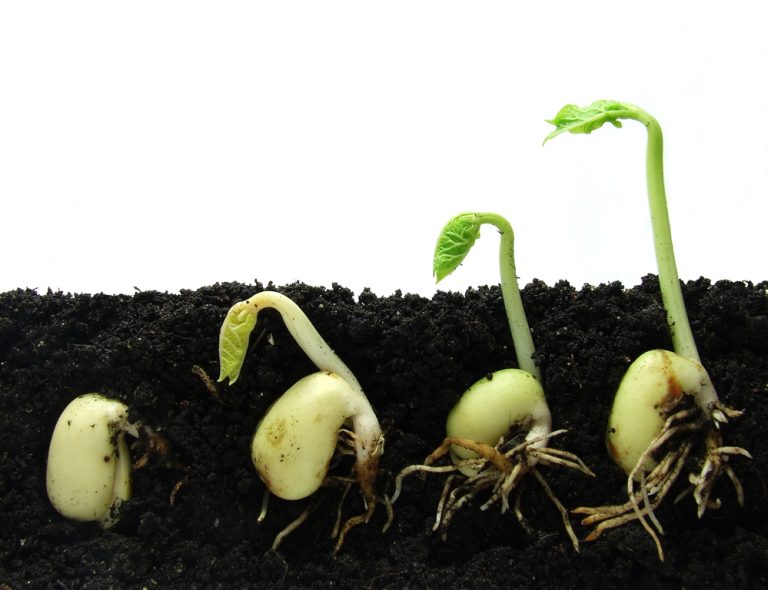
Understanding Seed Depth
When planting seeds, depth is one of the most important details to pay attention to. Planting too deeply may prevent a seed from reaching sunlight, while leaving it too close to the surface can cause it to dry out quickly. Most seed packets include guidance on appropriate planting depth for each variety.
A simple rule helps beginners: plant seeds at a depth about two to three times their diameter. Extra-small seeds like lettuce or poppy usually go right on top of the soil and are only lightly pressed in. Larger seeds such as peas or sunflowers can go deeper without trouble.
Spacing Seeds Properly
Planting seeds too close together can lead to overcrowding and competition for resources. Plants need enough room for leaves to spread and roots to grow down and outward. When seeds are spaced correctly, air flows more easily around the seedlings, reducing the risk of disease.
Seed packets or garden charts often recommend exact distances. Indoors, space limitations may tempt you to plant too many seeds in one tray. It may feel inefficient to leave open space, but in time, you will see that healthier seedlings are the reward of proper spacing.
Watering with Care
Planting seeds involves keeping the soil slightly moist, never soggy. Too much water can drown a seed or encourage mold to form, while too little water can cause a seed to dry out before it has a chance to sprout. Gentle watering methods like misting or pouring slowly along the soil edges help protect tiny seeds from being washed away.
After seeds sprout, consistent moisture helps roots strengthen. Touching the soil surface with a finger once a day tells you whether water is needed. When watering feels like nurturing rather than controlling, seedlings respond with steady and healthy growth.
Providing Enough Light
Every gardener learns that planting seeds is only the beginning. Once they sprout, seedlings stretch toward the brightest source of light. Without enough light, stems become weak and thin. Sunny windowsills can work for indoor planting, especially for herbs and leafy greens that do not require intense light.
If natural sunlight is limited, simple grow lights make a big difference. Position them a few inches above seedlings and adjust the height as plants grow taller. Strong, steady light encourages short, sturdy stems that are ready for outdoor life when weather conditions improve.
Maintaining Ideal Temperature
Seeds have preferred temperature ranges for germination. Planting seeds outside too early in cold soil may slow or block sprouting entirely. Warm-season crops like tomatoes, pumpkins, and peppers need soil temperatures above 60°F. Cool-season crops like spinach and peas tolerate lower temperatures and can be planted earlier in spring.
Indoors, room temperatures usually work well, but drafts from windows or sudden cold chills may affect sensitive seeds. Some gardeners use heat mats beneath trays to keep temperatures steady, especially for warm-loving varieties that need extra help during early growth.
Labeling Seeds Clearly
Planting seeds often involves multiple varieties at once, and it is surprisingly easy to forget which seed went into which cell or row. Labeling helps track progress and avoids confusion later. Simple tags, craft sticks, or even strips of masking tape can serve as markers.
As the garden fills with more varieties during the season, labels become even more useful when planning harvest dates, watering needs, or transplanting schedules. Recording seed type and planting dates creates valuable notes for learning year after year.
Thinning Seedlings When Needed
It might feel counterintuitive, but planting seeds sometimes means removing a few young plants to protect the rest. When several seeds sprout in a single space, they compete for water, nutrients, and light. Thinning seedlings ensures the strongest have what they need to succeed.
Use small scissors to snip extra seedlings near the soil surface rather than pulling them out, which can disturb the remaining roots. After thinning, plants grow sturdier and develop better structure compared to crowded seedlings struggling in tight conditions.
Ventilation and Airflow
Healthy airflow helps seedlings breathe and supports stronger stems. Planting seeds indoors in still air can encourage fungus and plant stress. Opening windows for fresh air or using a small fan to circulate gentle airflow toughens seedlings gradually as they grow.
Plants started outdoors benefit naturally from breezes, sunlight, and wide space. Whether indoors or out, air movement prevents diseases that flourish in warm and damp environments. Encouraging airflow is an often-overlooked technique that protects growing plants.
Protecting Seedlings from Pests
Once sprouted, planting seeds continues to require care because pests may arrive early. Tiny insects such as fungus gnats or aphids feed on tender seedlings. If planting outdoors, birds may dig up seeds before they sprout. Barriers such as mesh covers or floating row covers can help block pests while still letting light and rain reach the soil.
Maintaining cleanliness also matters indoors. Removing fallen leaves and avoiding standing water keeps pests from thriving. When pests are discovered early, simple solutions such as hand-removal or mild soapy water sprays prevent bigger problems later.
Transplanting Seedlings Outdoors
The final step after planting seeds indoors is moving seedlings to an outdoor garden. Transplanting should happen once plants are strong enough and weather conditions match their needs. However, shifting suddenly from protected indoor environments to outside elements can shock plants. Gradual hardening off prepares them for sun, wind, and cooler nights.
Place seedlings outdoors for a short time each day, increasing exposure slowly for about one week. This method helps leaves and stems toughen up before they settle into their permanent location. Proper transplanting ensures healthier growth and better yield throughout the season.
Learning from Every Season
As beginners complete their first cycle of planting seeds, they gain knowledge that improves with each attempt. Observing which plants thrive, which struggle, and why helps shape better decisions in the future. Keeping a simple gardening journal can track timelines, weather observations, and harvest results.
Failures are simply information. Every experienced gardener has stories of seeds that never sprouted, plants that wilted unexpectedly, or pests that arrived too soon. Yet every setback becomes a lesson, and each new season offers another chance to grow more confidently.
References
- https://www.sciencedirect.com
- https://www.frontiersin.org
- https://www.tandfonline.com